

This chapter documents how to use a domestic cloud to reverse-proxy OpenAI
Register a Tencent Cloud Account
Enter the Cloud Function Console
Click to go directly to the Cloud Function Console
Create a New Cloud Function
Basic Configuration
- Step 1
- Click
Create - Select
web functionas the function type - Any name is fine; here I named it:
openAI - Choose
Hong Kongor anotheroverseasregion - Time zone:
Default
- Click

Function Code
- Step 2
- Choose
Local ZIP Upload - Click to download ZIP
- Choose

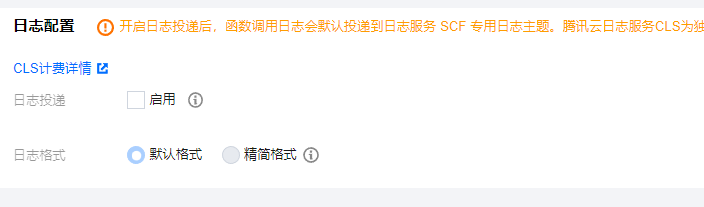
Log Configuration
- Step 3
- If you enable it, fees may be incurred — a few mao? About one yuan? It depends on your usage!!!
Advanced Configuration
- Step 4
- Start with the environment configuration
- Memory:
64MB - Initialization timeout:
Default - Execution timeout:
900 seconds

- Step 5
- Scroll down to
Request concurrency - Enable it and choose
2 concurrent - Everything not mentioned:
Default

Trigger Configuration
- Step 6
- Type:
Default - Alias:
Default - Request method: select
ANY - Release environment:
Default - Authentication method:
No authentication
- Type:

This step may go like mine: the related server role is abnormal — just click to authorize. If that doesn't work, create a new trigger
Address
- You need to remove the trailing
/release - The resulting address is your API endpoint
- Accessing it directly will return
404

How to Use the API
Use it in any software that supports configuring the OpenAI domain
Example:
- Using a third party: CatGPT
- Click the 🔑 icon in the top right corner, and enter the address we built in the API address field
- Enjoy using OpenAI
OpenAI Node.js
Official usage
const configuration = new Configuration({
  apiKey: OPENAI_API_KEY,
  basePath: 'https://service-aaaaa.hk.apigw.tencentcs.com/v1'
})
Self-Hosting
Hosting steps
git clone https://github.com/Ice-Hazymoon/openai-scf-proxy
cd openai-scf-proxy
npm install
npm run start
Notes
You need to register your own OpenAI—key
Someone else's OpenAI—key may require payment
If you enjoyed this, leave a comment~